Bitta Apps · Full demo · 29:27 · YouTube
Bitta Consignment for Business Central: the full demo
What this video covers
Bitta Consignment, end to end, in seven parts: vendor stock you hold but don't own, and your own stock at customer sites.
Set it up, receive and count Alder Surgical Supply's implants and kits, run them through Warehouse Mode, sell them to Kettlebrook Orthopedic Clinic, settle and return at month end, bill Cedarline Surgery Center for what it used, and trace any serial with Find entries and the reports.
Every screen is the real app in Business Central.
Transcript
You run operations at a medical supply distributor. Alder Surgical Supply places implants and kits on your shelves, and they stay Alder's until you sell them. Business Central has no consignment of its own. There's no owner on stock, and no way to keep a vendor's goods out of your inventory value. Bitta Consignment works in two directions. Vendor consignment is their stock at your place. Customer consignment is your stock at a customer's site, which reports what it used. Vendor stock follows five steps. Receive it, hold it, sell it on a normal sales order, settle with the vendor, and return or buy out what doesn't sell. While you hold it, vendor stock lives in its own Consignment Ledger. No item ledger entry, no value entry, nothing in the general ledger. Your inventory value doesn't move. At the sale, a drop shipment buys and sells the unit in one step, so the sale gets its real cost.
Setup is one guide. Open Assisted Setup and choose Set up Bitta Consignment. You can run it again any time, and nothing is saved until you choose Finish. The Defaults step usually needs no change: two general number series, a source code, and one purchasing code, CONSIGN. That code is the one new thing your sales team learns. A sales line with it sells vendor stock as a drop shipment. Next, each document type gets its own number series, one for open documents and one for posted ones. Clear a series, and that type uses the general one. Then switch on the locations that hold vendor stock. Here, the North Warehouse. Vendor stock and your own stock can share it. Mark your consignment vendors, and give each one a default location. Alder Surgical Supply delivers to North. For consignment sales, the vendor's purchase order is created when you release the sales order, and a line that asks for more than the vendor holds is stopped. In a sandbox evaluation company, the Demo data step can add a sample vendor, a location with bins and four items, with stock already received. In any other company, it tells you why it's not available. On the License step, start a free thirty-day trial for three seats, or enter your activation code. Keep Give Me a Seat on, so you can post right away. The last step explains the two ways to hold vendor stock: out of your inventory at a consignment location, or at zero value in Warehouse Mode. Then choose Finish. Everything the guide saves lands on Consignment Setup, next to the rest of the settings, for when you need them.
Next, permissions. The app adds three permission sets, on top of the standard ones people already have. Read is for anyone who looks up consignment stock. Edit is for warehouse, sales and purchasing staff. They create, release and post consignment documents, and sell consignment stock. Setup is for administrators: Consignment Setup, the journal batches and the seats.
A seat is a person who works with consignment documents: receipts, the journal, counts, settlement and customer sites. Sales staff who sell consigned stock don't need one. Sales orders, drop shipments, returns, pages and reports always work, with or without a license. Open Bitta Consignment License to see the status, the dates, and how many seats are used. To give a colleague a seat, choose Assign Seat under Seat Holders. A removed seat is free at once, but the same person can get one back only after thirty days, so seats aren't passed around. If the license ends, you get fourteen days of grace. After that, only the licensed actions stop. Everything else keeps working. Setup saved, permissions given, seats assigned. Alder's stock can come in, and your books stay clean.
Alder's delivery arrives. On Alder's vendor card, choose New Document, then Consignment Receipt. The location comes from the vendor: North. Add Alder's delivery note number, then one line per item, with the total quantity and the bin. The knee implants are serial tracked. Assign all three serial numbers in one go, from the first one. It stays one line, and Tracked Quantity shows three. The screw kits come in two lots. You enter them on Business Central's own Item Tracking Lines, as on a purchase order: twenty from one lot, and four that expire next month. Post it. The stock goes to the Consignment Ledger only. Your inventory, its value and your general ledger don't change. On the vendor card, the Consignment FactBox now shows Alder's stock on hand, what came in this month, and what expires within thirty days.
Vendor stock and your own stock can share a bin. Consignment Bin Contents shows them side by side. Each row has an owner, Alder or your own stock, with Alder's quantity, what's committed and what's available next to your own quantity. For a walk through the bins, the bin count sheet lists both, with an owner column, so one walk counts everything. Short-dated stock doesn't hide. On the role center, Lots Expiring Soon counts the lots and serials inside your alert days. Open it, and there's the short-dated lot: its expiration date, the days left, the bin and the vendor. Sell it first, or send it back.
For quick fixes, use the Consignment Journal. The quantity is always positive, and the entry type gives the direction. A reclassification moves six drape packs to bin A-02. They keep their received date, so aging doesn't restart. A negative adjustment takes out one damaged pack, with a reason code. Preview the entries, then post.
When you need a release step or a printout, use a transfer or an adjustment document instead.
Counting starts on the location. Count Consignment Stock knows which count North uses, and says what happens. Choose Alder, the knee implants and bin A-01. The count opens with what the ledger expects. Now scan. A keyboard scanner types each code and presses Enter for you. The bin first, then each serial number. Each serial adds one unit, once. Last Scan tells you what was added, or why not.
Count Item Tracking Lines puts every expected serial next to what you counted. A missing unit would show as a difference. Every implant is there. Post the count. Only differences become entries, and the posted count stays as your record.
When Alder's stock runs low, ask for more. On the stockkeeping unit for the item at North, set a consignment reorder point and maximum. They're separate from the planning fields, because vendor stock isn't your inventory. On the vendor card, Suggest Replenishment Requests proposes what to ask for, filling each item up to its maximum. Release the request and print it, or send it. It now shows Sent. When the goods arrive, Create Receipt turns the request into the consignment receipt. So, what do you have of Alder's, and where? Every unit, by bin, lot and serial number. And none of it is in your inventory value.
Bitta Consignment holds vendor stock in two ways. At a normal consignment location, it stays out of your inventory and sells as a drop shipment. At a Warehouse Mode location, it's native inventory at zero value. Bins, warehouse receipts, put-aways, picks, shipments and counts work for it as for your own stock, and the Consignment Ledger still knows which vendor owns each unit. Use it where the warehouse runs on warehouse documents or directed put-away and pick. Where the warehouse is simple, a normal consignment location is enough.
Warehouse Mode is set per location. On the location card, here the South Distribution Center, choose Set Up Consignment Warehouse Mode. Choose the item charge that settlement uses to pay vendors, and keep Create Stockkeeping Units on. The Checks step reviews everything before anything changes. Findings marked Must fix stop Finish. Check names an item to look at. For a Must fix, Show opens the page that fixes it. Fix it there, come back, and choose Next: the guide checks again. Nothing left to fix. Choose Finish, and the location is in Warehouse Mode.
Alder Surgical Supply's delivery comes in on a consignment receipt, the one consignment document this location uses. Delivery in parts? Lower the quantity to receive. Each posting makes its own purchase order, and the rest stays on the receipt. Post it, and the app creates a purchase order to Alder at zero cost. The message names the next step, and offers to open it. The purchase order is released for the warehouse. Create the warehouse receipt. Post the warehouse receipt as usual, and Business Central creates the put-away. The put-away proposes bin STOCK for every line. Register it, and the stock is on the shelf. In the item ledger, the stock is in, at zero cost. Your inventory value doesn't change.
Because the units are native inventory, the item's Quantity on Hand now includes Alder's stock. So the item card adds Own Inventory: the units that are yours, without the vendor's stock. Choose it to see the entries that are yours. The Consignment Stock FactBox starts with your own inventory, then each vendor's stock on hand.
Kettlebrook Orthopedic Clinic orders six drape packs. It's an ordinary sales line, with no purchasing code. Release it and create the warehouse shipment. Create the pick and register it, as for your own stock. Post the shipment. The app records that Alder's units were sold. To count, choose Count Consignment Stock on the location. Here it opens the physical inventory journal, with Calculate Inventory already run. Enter what you find and post. A shortage comes off the vendor whose units they were. For a surplus that is the vendor's, fill in the Consignment Vendor No.
Now pay Alder. On Consignment Settlement, Warehouse Mode Units to Charge lists the units sold here that aren't charged yet. Select both rows, and choose Create Settlement Documents. The item charges go on one purchase invoice to Alder, assigned to the sales shipments. Check the invoice and post it. That's how the vendor's cost reaches your books. Posted it by mistake? On the posted invoice, choose Correct, then Cancel. Business Central posts a credit memo that takes the charges back, and both rows are ready to charge again. Receipts, put-aways, picks and counts, now for vendor stock too. And Alder is paid for exactly what sold.
Start where your sales team always starts: a sales quote. Kettlebrook, your North warehouse, one Titanium Knee Implant, Size 4. You have none of your own at this location, and the app tells you so. Alder has stock here, so it offers to sell from consignment stock. Choose Use consignment stock. It sets the purchasing code CONSIGN on the line, and that code is the only new thing on the document. The app fills in the vendor with the oldest stock here, Alder, and checks that Alder has enough. The Consignment Stock FactBox shows Alder's stock on hand, what other open lines have already taken, what this line can still sell, and the totals of every vendor. A knee implant has a serial number, so you choose the unit. Select Consignment Stock lists every unit the vendors hold here, with its bin. Give one serial a quantity of one and choose OK. The line now carries that serial and its bin. You can also use Item Tracking Lines as usual, or let the app assign the oldest or first-expiring stock when you release. By default, a quote doesn't hold stock. A quote isn't a promise. Kettlebrook says yes. Make Order moves the vendor, the serial and the bin to the new order, and checks the stock again.
Now release the order. With the default setup, release is the moment the app creates a purchase order to Alder. There's no extra step. Alder's new purchase order is waiting in Purchase Orders. It's a drop shipment from Alder, with Consignment selected, and it ships straight to Kettlebrook's address. What you pay Alder follows their terms on the vendor card: their normal purchase cost, or a share of what you sell it for. When you ship, Business Central buys the knee from Alder and sells it to Kettlebrook in one step. Until then, it's still Alder's. Need to change the order after that? Reopen it, choose Remove Consignment Purchase Lines, change the line, and release again.
Business Central can't reserve a drop-shipment line. So the app keeps a commitment instead. Every open consignment line takes its share of the vendor's stock, and the next line can only take what's left. Watch it work. A colleague starts an order for Cedarline Surgery Center, and the FactBox already counts Kettlebrook's knee as committed. Then they type the same serial number. Refused. A serial number can be on one open sales line only, and the message names the order that holds it. Now ask for more knees than Alder has left. You get one clear message: what the line asks for, what's available, and what to do next. That's the strictest setting, and the default. You can lower it to a warning, but posting a shipment always stops when the stock isn't there.
Back on Kettlebrook's order, post the shipment. Business Central posts the pair, Alder's purchase receipt and your sales shipment, and the app writes a Sale entry in the Consignment Ledger. To see it, open the posted shipment and choose Find entries. The Consignment Ledger Entry sits next to Business Central's own entries. One Sale entry for that serial, from Alder's stock, with your shipment and the bin it left. Posted too soon? Undo Shipment works as usual. The app writes a correcting entry, and the knee is back in Alder's stock, with its serial and bin. When the courier is really at the door, post the shipment again. Shipped today, from stock you never owned. Alder has its purchase order, and that serial can't be sold twice.
First, one knee came back. Kettlebrook's surgery was cancelled, and the implant is still sealed. You have two choices. Keep it as your own stock, because you bought it from Alder when you sold it. Or put it back into Alder's consignment stock, and Alder credits you. Create a sales return order for Kettlebrook and choose Get Posted Document Lines to Reverse. Pick the line of the original shipment. The app sees that the unit came from consignment stock and asks what to do. Choose Return to consignment. The line now shows Alder as the vendor, and the bin the knee was sold from.
Post the return receipt. The knee comes into your inventory first, and the app creates a purchase return order to Alder for that serial. Open the purchase return order and post it as well. The knee is back in Alder's stock, with its original received date, so its age doesn't start again. In Consignment Setup, Return to Consignment sets the default: ask each time, always, or never.
Stock you won't sell goes back to Alder with a return to vendor. You never bought it, so your item ledger and Alder's account don't move. Only the Consignment Ledger does. Choose Alder and the location, then Get Consignment Stock, and pick six bone screw kits of one lot.
The carrier takes four today. Lower the quantity to handle to four, set the same on the lot, and post. Only that part goes. The return stays open with the other two. Post it again when they leave.
Sent the wrong lot? Open the posted return and choose Undo Return to Vendor. A correction line brings the kits back into Alder's stock. Receipts undo the same way. Undo Receipt takes the stock out of the ledger again, as long as nothing has happened to it since.
Some stock you'd rather own. An ownership change buys vendor stock into your own inventory without selling it. Choose Alder and the location, then Get Consignment Stock: two screw kits. Post. The app creates a purchase order to Alder and receives it at once. The kits are yours, and the receipt waits for the same settlement as your sales. Stock that sits too long can be proposed for you. On the vendor card, give Alder an aging period, say ninety days, and an aging action: notify, propose an ownership change, or propose a return. Age counts from the first receipt, so moving stock doesn't reset it. The aging job proposes documents. It never posts them. If production, assembly or a project uses vendor stock, turn on Buy Out at Consumption. When your own stock is short, posting the consumption buys out what's missing, one ownership change per vendor.
Now Elena's question. The vendor card's Consignment FactBox shows what Alder sold that you haven't invoiced yet. Open Consignment Settlement. Set the last day of the month as the Up to Date, and Alder as the vendor. It lists every receipt line received and not invoiced: this month's sales and the buy-out. Below them, the returned knee waits to be credited. Tick Select on the lines to settle, and on the return, then choose Create Settlement Documents. You get one purchase invoice per vendor, and a credit memo for the return. Enter Alder's invoice number, check the amounts against theirs, and post. It's standard purchase posting. On the invoice, the Consignment Settlement FactBox counts what it pays for: units sold and units bought out. Then print the Consignment Settlement Summary. One row for every unit or lot, with its date, serial or lot number, and where it came from. The return follows as a credit. Leave Show Customer off when Alder shouldn't see who bought. For the whole month, the Consignment Vendor Statement shows each item: opening stock, received, sold, returned, and closing. You send the summary with the invoice. Every unit, accounted for.
With customer consignment, your own stock sits at a customer's site. It stays in your normal item ledger, at a location that belongs to the customer, and they pay only for what they use. In Consignment Setup, name a template location that new sites copy, and the warehouse that fills them. Then choose whether usage invoices post right away. Cedarline is a consignment customer, and today their sterile core gets its own site. On the customer card, choose Create Consignment Site. Pick the ship-to address of the sterile core. The location code and name are proposed for you. Choose OK. The site is a new location, linked to Cedarline, with the template's settings and posting setup. Choose Consignment Sites on the card, and the new site is listed with Cedarline's other two.
Give each item at the site a stockkeeping unit: here, gloves and screw kits. Each has a reorder point and a maximum. Then choose Suggest Site Replenishment. Every item at or below its reorder point gets a quantity that fills it back to the maximum. Change any quantity right on the page. Set a line to zero to skip it this time. Choose OK, and you get one transfer order per site. Post it with Ship and Receive, as always. From the posted shipment, print the site delivery note. It lists every item sent to the site, and each lot with its expiration date.
Cedarline tells you what they used. You record it on a usage report, and there are three ways in: type the lines, scan them, or import them from Excel. From the customer card, open a new usage report. Choose the site, and enter Cedarline's reference. It carries over to the invoice. Then choose Scan Lines. At the site, that's a barcode scanner that types into the Scan box, or the camera of a phone or tablet. Each scan of the lot adds one kit. Three scans, one line: three screw kits, ready to bill. Before you post, Preview Posting shows what will happen: the item ledger entry, and the customer and general ledger entries of the invoice. Nothing is posted yet. Post it. The usage report becomes a sales invoice for Cedarline, like any other sale. With Post Usage Invoices on, it's posted right away. Open it: one line, three screw kits.
Now and then, count what's really on the shelf. Start a site count and choose Calculate Expected: every item at the site, with what your ledger expects. Enter what you found. Nine boxes of gloves, where ten were expected. That's one short. What happens to a shortage is set per customer. Cedarline's is Invoice Customer, so they pay for it. Write Off is the other choice. Post, and the message says exactly what happened: the count is posted, and the shortage is invoiced to Cedarline.
Back on the customer card, the Consignment Sites FactBox shows each site with the stock still there and its value, after the usage and the count. And the Consignment FastTab shows the value of all your stock at their sites. Turn on Stock in Credit Check, and that stock counts against Cedarline's credit limit when you sell to them. Turn on Send Statement, and Cedarline gets a statement every month: the stock at their sites, and what was sent, used, counted and returned. In Consignment Setup, the credit check needs its own switch too. Then choose Schedule Statements, which opens the monthly job. The job starts on hold, so you check it first, then set it to Ready. At year end, the Consignment Stock Confirmation asks Cedarline to confirm and sign for the stock of yours that they hold. Three kits used, three kits billed. The site is counted, and the statement goes out on its own.
Every movement of vendor stock is a consignment ledger entry: receipts, moves, counts, sales, returns and ownership changes. Each one names the vendor, the item, and its serial or lot. You reach these entries from wherever you start, like item ledger entries. Here's the posted shipment of Kettlebrook's knee implant. Choose Find entries. Next to the item ledger and value entries, the list has the Consignment Ledger Entry that the shipment posted. Choose it to open the entry. Or start from the serial number itself. In Find entries, search by the serial number instead of a document. Consignment entries sit next to the native tracking results. Open them: received from Alder, then sold to Kettlebrook.
It works before posting too. Preview Posting on a sales order lists the consignment ledger entries that posting will create. For a recall, the Lot and Serial Trace report puts every entry of a lot or serial on one sheet. Show Customers Only turns it into your contact list.
Every posted consignment document stays at hand in Posted Consignment Documents. Print it again, send it, or find its entries.
The Consignment Stock Report shows vendor stock at any date, by vendor, location, item and bin, with lots, serials and expiration dates. Its values are informational. The stock belongs to the vendor, so it's never part of your inventory value. The aging report sorts open vendor stock into four age buckets, and marks what has expired or expires soon. Five more reports open in Excel, one row per entry: unsettled liability at month end, sales and margin, turnover and slow movers, the lot and serial trace, and your stock at customer sites.
On the Order Processor role center, the Consignment cues count what needs you: lines to ship, open usage reports, and lots expiring soon. Choose a cue, and the list behind it opens. The Consignment menu holds every consignment document, stock page and report, in one place. The cards help too. On the vendor card, the Consignment FactBox shows Alder's stock on hand, what sold this month, and what's sold but not invoiced yet. On the item card, the Consignment Stock FactBox shows who owns the stock on hand: your own inventory first, then each vendor. For dashboards, Bitta Consignment comes with a Power BI template. Connect it to your company, and it reads your consignment data live: vendor stock, aging, margin, settlement, customer sites and trace. Once you've published your report, show it on your role center in the Consignment Power BI part.
When the app refuses something, the message says why, and often offers the fix. Here are three you'll meet. A serial number can be on one open sales line only. Assign one that is already promised, and the message names the other order and its customer. Show Sales Order takes you there.
Ask for more than the vendor holds, and the line stops with what it asked for and what's available. Reduce the quantity, choose another vendor, or receive more stock. When posting finds several problems, nothing posts. Error Messages lists them all: here, a knee implant with no serial number, and more than the vendor has in stock. Select one, and choose Open related record to go straight to the line. Fix it, and post again. For the rest, the troubleshooting page of the guide lists the common messages, why they appear, and how to fix them. So where did that knee implant go? Received from Alder, sold to Kettlebrook, and every step is a click away.
Product videos
All videos 1:02OverviewSales Commission in Business Central
 1:07OverviewPoint of Sale for Business Central
 0:56OverviewBusiness Central Search That Forgives Typos
 1:02OverviewDark Mode and Themes for Business Central
 1:01OverviewReport Business Central Issues Support Can Fix
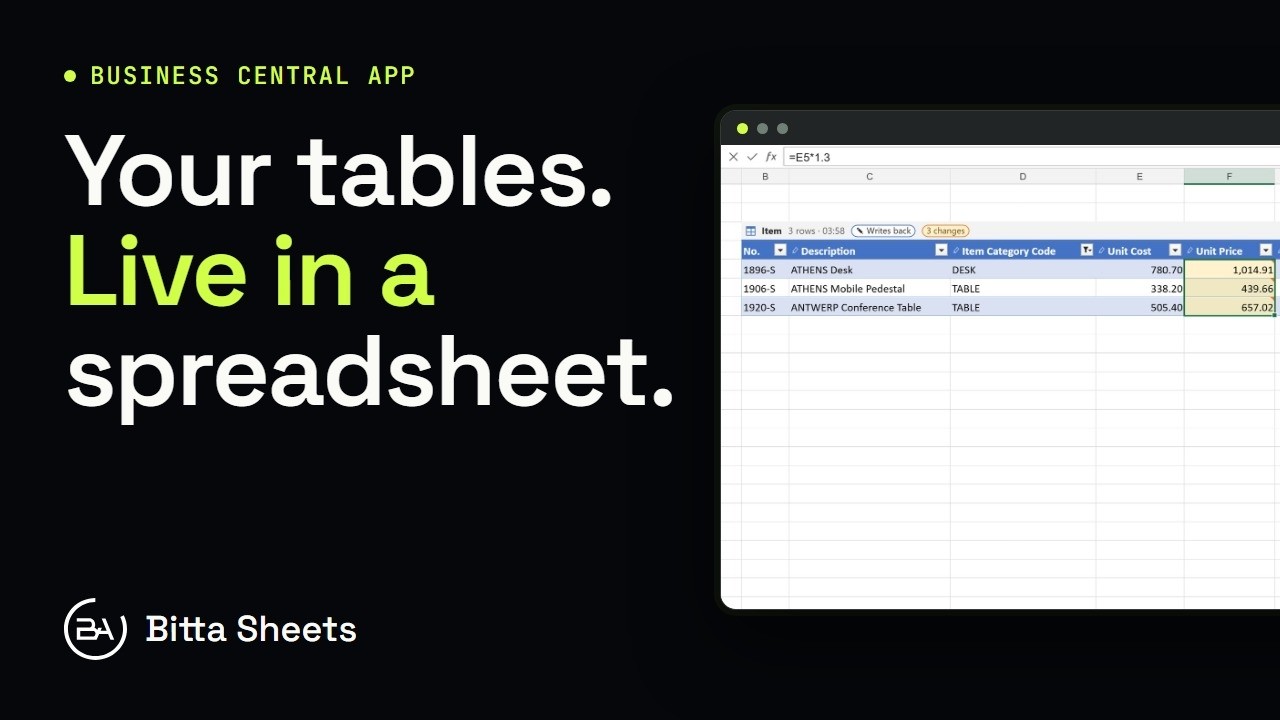 1:18OverviewEdit Business Central Tables Live in a Spreadsheet